
Pallet Town and Route 1

It is here that our adventure begins. Our protagonist wakes up and heads downstairs to mom only to find out that Professor Oak would like to see him in his lab. After some running around and some time playing a delivery person, it is time to choose my very first Pokémon. I remember my first choice from two decades ago: Charmander. It was a choice that I regretted soon after encountering the first gym leader, Brock. I didn’t make that choice again and I chose Squirtle. To me, the logical choice would be Bulbasaur, a grass Pokémon, as it is strong against water, ground, and rock Pokémon, but Squirtle does have a distinct advantage against our first gym leader. I also wanted to choose a Pokémon I never started with before. After battling my rival, I head out onto Route 1 to catch my first Pokémon. I caught a Pidgey and a Rattata. I then headed towards Viridian City.
Viridian City and Route 2
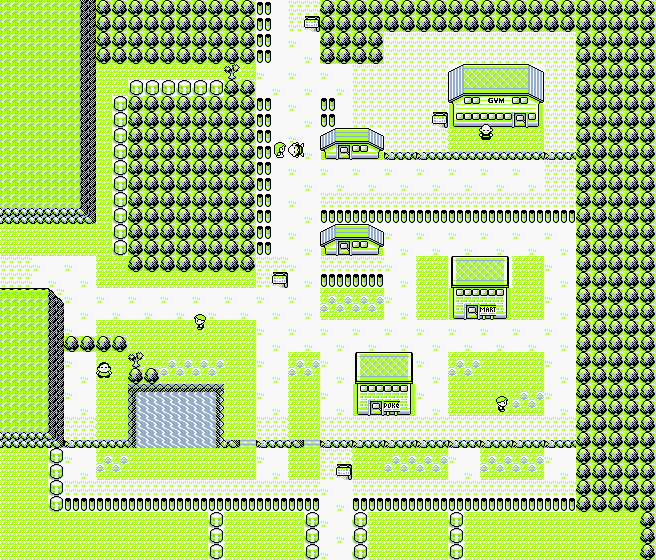
I made a stop and the Pokécenter to heal up and then wandered the town a bit. The gym in Viridian City is not available yet so there’s not much to do here besides heal up and stock up on supplies. I purchased as many Pokéballs as I could and headed to Route 2. While on Route 2, I spent some time leveling my party, but there was nothing significant to catch that wouldn’t be catchable in the upcoming Viridian Forest. I am playing using the original Nintendo Power strategy guide so it has been helpful for me to see what Pokémon are available on each route. There are several houses and buildings on the other side of Route 2 that are inaccessible at the moment because I don’t have HM 01 Cut, but will definitely head back as I can pick up HM 05 Flash and trade an Abra for a Mr. Mime.
Viridian Forest
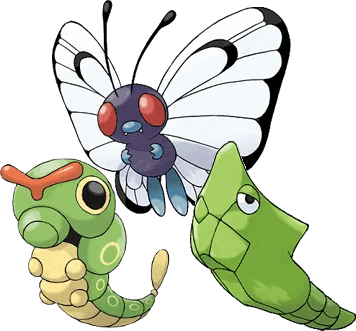
Ahh. The creepy, ominous music of Viridian Forest. I’m excited to battle trainers here as earning money is so limited early on. My strategy is to have as many Pokéballs on hand as possible to be able to fill my Pokédex. What’s also exciting is that there are a TON of grass/bug type Pokémon to catch here. I caught Caterpie and two Metapod (with plans to evolve one into a Butterfree). I spent a fair amount of time here leveling the Metapod until it evolved. I made a couple of trips to Pewter City to heal, but I was able to level my Squirtle to level 12. I was unable to catch a Pikachu and didn’t want to waste time grinding to search for one since I can find one by the Power Plant later on. While this feels like a pretty good decision on my part, I wonder if I’ll regret this when I face my second gym and Misty’s water Pokémon. Before I made my way to the gym, I decided to double back and fight my rival on Route 22 for some easy XP and cash. I also caught a Male Nidoran in the tall grass there.
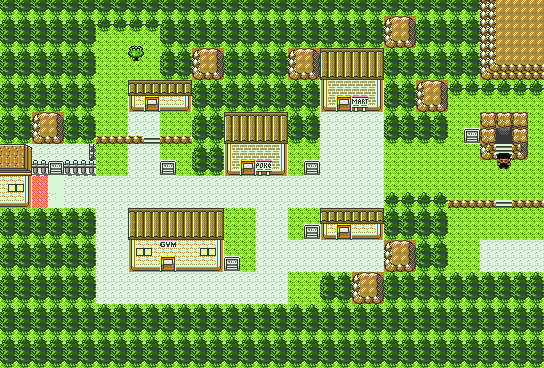
Pewter City

Pewter City is not too big: it holds the Museum of Science and Pewter City Gym (there’s also a Secret Lab that isn’t accessible until I get the move Cut). I decided to heal up and head directly to the gym to fight Brock. There was one Junior Trainer encounter before I’d meet Brock and I made quick work of his Diglett and Sandshrew. I then healed up and confronted Brock. It’s important to note that the Red and Blue versions of Pokémon games are harder than Pokémon Yellow. I believe this was an attempt to appeal to a larger audience. For example, in Pokémon Yellow, Brock’s Geodude is level 10 and his Onix is level 12. In Red and Blue, they are level 12 and 14 respectively. Since I am playing Pokémon Blue, his Pokémon were at that higher level, but also awarded more XP. Squirtle one-hit both Geodude and Onix with Bubble and just like that, I had my very own Boulder Badge. I also obtained TM 34 Bide. Now that I have the Boulder Badge, I will be able to use HM 05 Flash when I obtain it. After defeating Brock, my next stop is Route 3.
Route 3

Route 3 is another place where I can level my party and earn money as there are eight trainers to face. In addition the trainer battles, I need to catch the ever-elusive Jigglypuff as this is the only location in the game I can find one. Right away, I added a Spearow to my collection and spent 10 or so minutes trying to catch Jigglypuff. What made it so difficult is that my Pokémon were leveled pretty high and every Jigglypuff that appeared was level 3. Also, Jigglypuff uses Sleep which renders my Pokémon useless. I wasted two Pokéballs trying to catch one, but I was finally successful in catching two Jigglypuffs (one to evolve with a Moon Stone I’d find at Mt. Moon). I spent a bit more time leveling here and my Squirtle evolved into a Wartortle. I headed to the Pokécenter to heal my party and take stock of my progress.
Mt. Moon
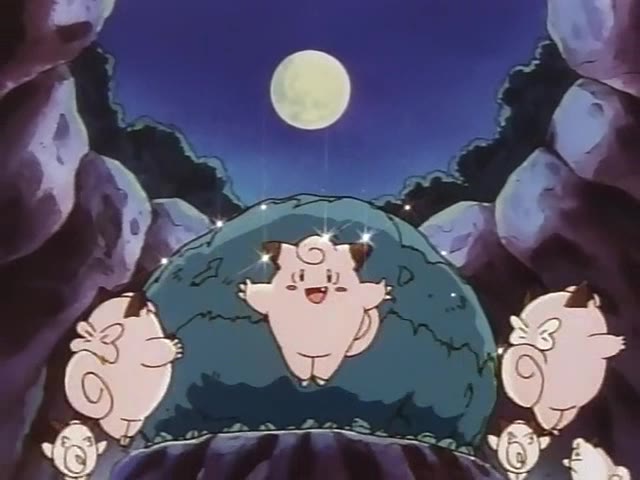
This part of my journey required a lot of running back and forth. I was a tad underleveled and could only make it through one floor at a time before having to go back to the Pokémon Center to heal. During one battle against an Oddish, my entire team was wiped due to Oddish’s Absorb attack. At one point, I had to use my Escape Rope as I became tired of the trek. I didn’t have much trouble here and tried to focus on capturing some rock Pokémon in anticipation of my fight with Lt. Surge later on. I was also on a quest to find a Clefairy, and managed to snag two (!!). I beat all the trainers on my way to my second Pokemon-related choice of the game: Which fossil do I choose? I chose the Helix fossil as it was the one right in front of me– I’ll simply choose the other on my playthrough of Red. I was now over my trek through Mt. Moon so I didn’t stay to grab a second one to evolve– I’ll just either catch one on a second playthrough of Red or buy one with some game tokens I earn later in the game. I made my way along Route 4 and caught a Sandshrew before heading into Cerulean City.
Cerulean City

I made a beeline to the Pokémon Center to heal up and sort my Pokémon. I deposited Beedrill into Someone’s PC and took out my recently caught Geodude. I figured that leveling Geodude would be the best option as I have an upcoming battle with Lt. Surge. I purchased 10 more Pokéballs and headed right to see Misty at the Gym. My Squirtle had evolved into Wartortle and was level 21 by the time I got to Misty. I knew the fight would be more difficult since it would be water Pokémon versus water Pokémon. It was. I died the first try, so I decided to regroup. I healed up my team and made my way towards the bridge heading North to Routes 24 & 25. I encountered my rival and made pretty quick work of him. After beating my rival, I went through the team Rocket challenge and battled five separate trainers and obtained a Nugget which I quickly sold for 5000 dollars. I stocked up on Pokéballs and some potions. I then headed back to the gym. After a long battle, I knocked out Misty’s Staryu and Starmie and obtained the Cascade Badge. I also got TM 11 Bubblebeam for winning. Now that Misty was out of the way, I could head north again to meet Bill. Before doing so though, I went to the Pokémon Center to use my two moon stones to evolve my Clefairy into a Clefable and one of my Jigglypuffs into a Wigglytuff.
Routes 24 & 25

I made my way to see Bill at his Sea Cottage. I thought about trying to catch an Abra while I was here, but recalled previous playthroughs and how difficult it was for me– I think one time it took me almost 45 minutes to catch an Abra. I reminded myself that this is the initial play through of the challenge and that there would be plenty of time to catch the Pokémon I needed. Before I got to Bill, I made sure to pick up TM 45 Thunder Wave along the way. I also fought eight trainers before reaching Bill’s Cottage which helped level up my Geodude in anticipation of Lt. Surge’s gym next. Once I got to Bill’s place, I gave him a hand and turned him back to himself as he was in Pokémon form. As a reward, He gave me a ticket to board the S.S. Anne. I headed back to Cerulean City and, since the way to Saffron City is closed at the moment, I took the underground pathway to Route 6. After heading through the underground pathway, I made it to Route 6 and battled the few trainers along the way so I could earn more money. I had to make one trek back to Cerulean City to heal up, but after that it was smooth sailing into Vermilion City.
Vermilion City

As soon as I arrived in Vermilion City I was met with a wave of nostalgia. The music in Vermilion City has this upbeat, optimistic tone and brought me right back to my late teens when catching Pokémon was new and exciting for me. I stopped to heal at the Pokémon Center and then had a list of things to do. First up, I wanted to finally get my hands on a fishing rod so I headed to the Old Fishing Guru to do so. After getting my fishing rod, I made my way over to the Pokémon Fan Club building in order to get my free bike voucher. Bikes cost one million Pokédollars in Cerulean City, so this was a no-brainer. I spent a minute listening to the Pokémon Fan Club President’s stories about his Pokémon and was on my way. Finally, I encountered a Pokémon enthusiast that wanted to trade his Farfetch’d for a Spearow. I decided not to make this trade because I HATE the name DUX for his Farfetch’d. It is unable to be changed, so I am thinking of playing Pokemon Yellow to catch a Farfetch’d in the wild so I can have it have the name I want. After that, I boarded the S.S. Anne.
S.S. Anne

Now that I was aboard the S.S. Anne there was a lot of exploring to do. My main goal is to obtain HM 01 Cut, but there are a plethora of items to be had. Items like Max Potions, Great Balls, Ethers are all key items that I could use along my journey. I methodically made my way through each room on the S.S. Anne– there are 3 separate floors with 15 or so rooms. In some rooms there is just an NPC with some dialogue like the guy who told me about sleeping Pokémon Snorlax. In other rooms, there were trainers to fight before you could grab whichever item was in the room. After spending almost an hour traipsing through the ship’s levels, I encountered my rival yet again. This battle was super easy since I trained my Wartortle to use TM 08 Body Slam– he annihilated all of my rival’s Pokémon in one shot. Now that my rival was out of the way, I could see the ship’s Capitan and obtain Cut. After comforting a vomiting Capitan, I was rewarded with HM 01 and could head off to face Lt. Surge. As I stepped back onto the dock, the S.S. Anne pulled away and I watched it sail into the sunset.
Lt. Surge Gym Battle

Now that I was finished on the S.S. Anne, it was time to use that new HM Cut and get to Lt. Surge. I wanted to use Sandshrew as my main Pokémon against his Electric-type Pokémon, but Sandshrew was only at level 14. I figured I’d take a chance with my Wartortle and its Body Slam against Lt. Surge’s team, but then decided maybe Geodude would be best. Before I could battle Lt. Surge, I would have to solve a puzzle of sorts. There are three rows of garbage cans (?) outside of Lt. Surge’s room and you have to activate two switches in consecutive order to unlock the door. If you did not push the second switch right after the first one, the puzzle would reset and you would have to start over. I could have read a guide, but I just kept trying until I got it right. It took me four tries and I got lucky and opened the door. Lt. Surge was not as difficult as I had anticipated. I used Geodude and its Rock Throw to down his Voltorb, Pikachu, and Raichu. Once I beat Lt. Surge, I earned myself the Thunder Badge and TM 24 Thunderbolt. I headed back to the Pokémon Center to heal up and continue on.
Current Progress
Generation I Living Dex Percentage: 11.26%
Generation I Living Dex Count: 16/151
Main Challenge Percentage: 2.47%
Played Time: 5 hours and 37 minutes


Leave a comment